Creating and managing projects
PhariaStudio organises your AI initiatives into distinct projects. Each project operates as an independent container for datasets and evaluations. This structure allows you to do the following:
-
Assign members to specific projects.
-
Control access to projects using roles (project owner or member).
-
Ensure there is no data leaking between projects.
View your projects
For an overview of all projects to which you have access, simply open the PhariaStudio landing page at https://pharia-studio.{_ingressDomain_}. While working in PhariaStudio, you can click the PhariaStudio logo at the top left to return to the landing page, in which your projects are listed:
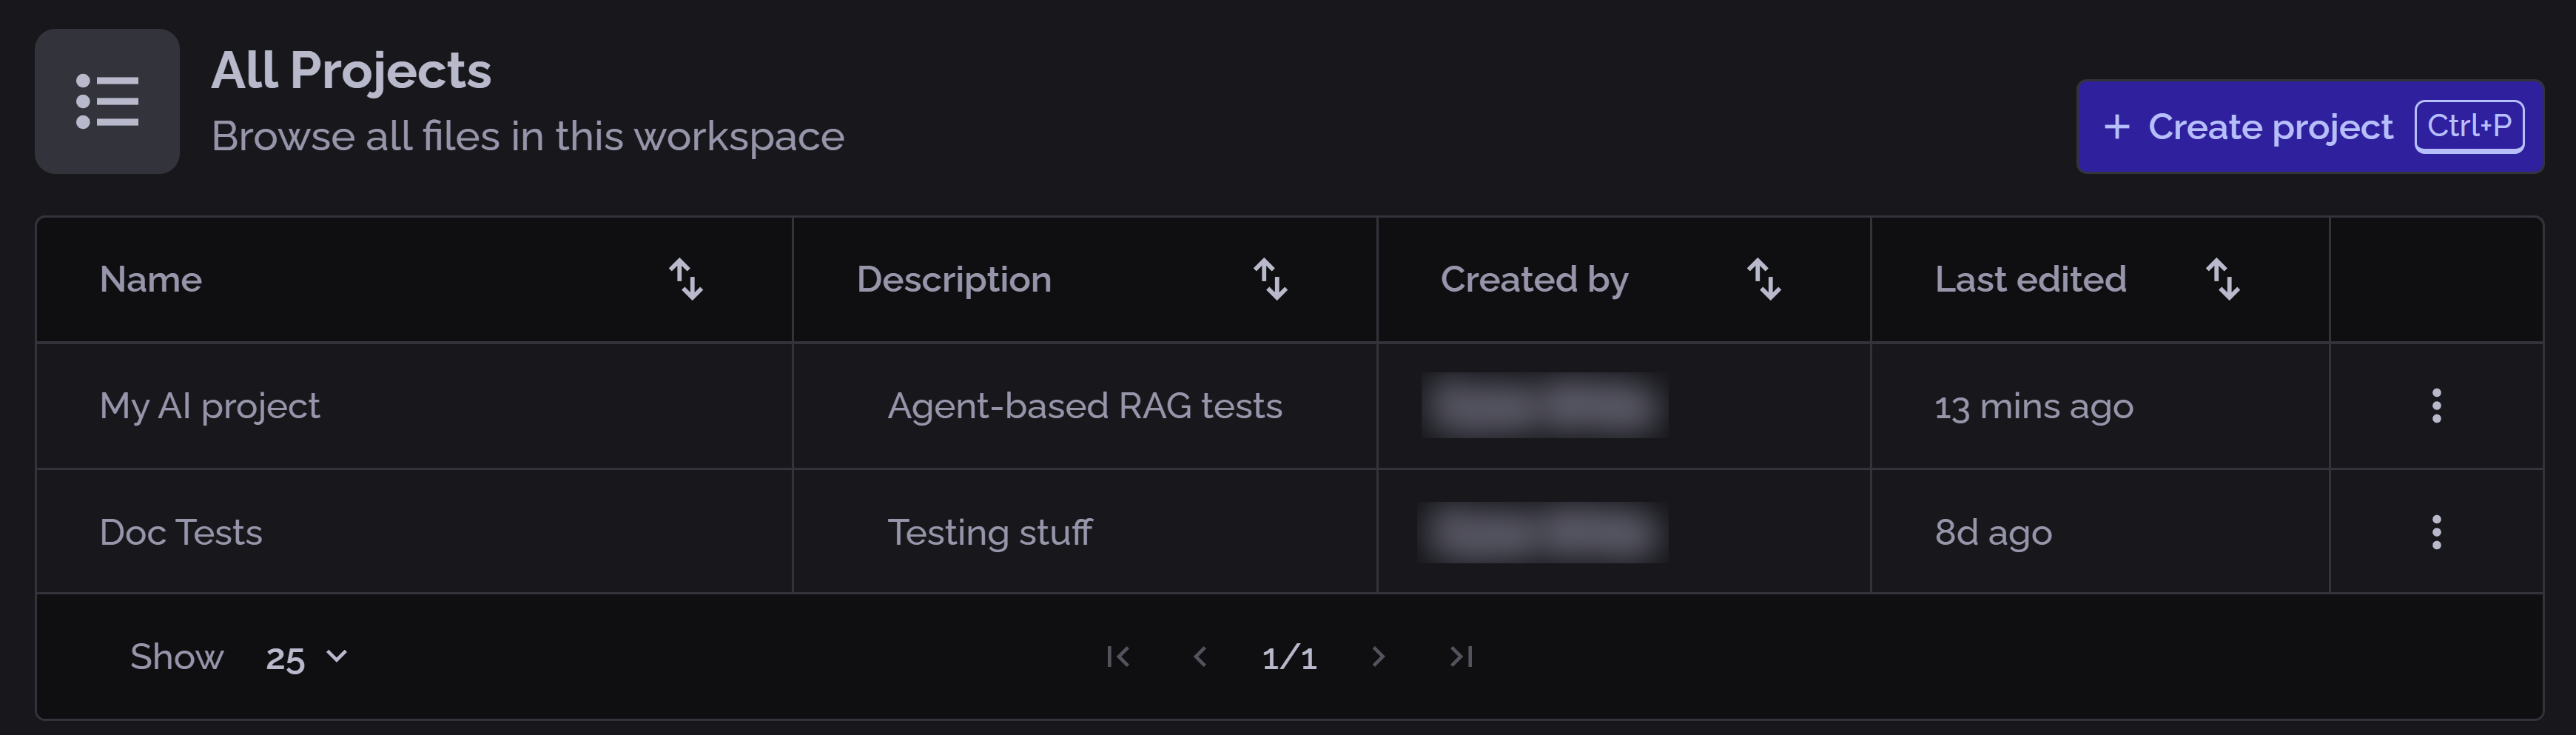
From the table you can do the following:
-
Open a project in the Playground by clicking its line in the table. (You can also select a project from the Workspace list in the header.)
-
Click the kebab menu icon
 to open a menu, from which you can:
-
Copy the project name.
-
Edit the project name and description.
-
Delete the project.
-
Create a project
You can create a project from the landing page of the PhariaStudio portal:
-
Open PhariaStudio at
https://pharia-studio.{_ingressDomain_}, or click the PhariaStudio logo at the top left. -
Click Create project.
The Create Project box opens:
-
Enter a name for the project.
-
Enter a description for the project.
-
Click Create.
The project is created with you as the project owner, and it is displayed in the Playground.
Manage access to the project
To avoid data leaks, PhariaStudio blocks access to all users who are not assigned to the project. The project owner can manage access to the project by adding and removing users.
Users can be assigned one of two roles on a project:
-
Member: these users can only work with the content of the projects.
-
Owner: these users can also manage access to the project.
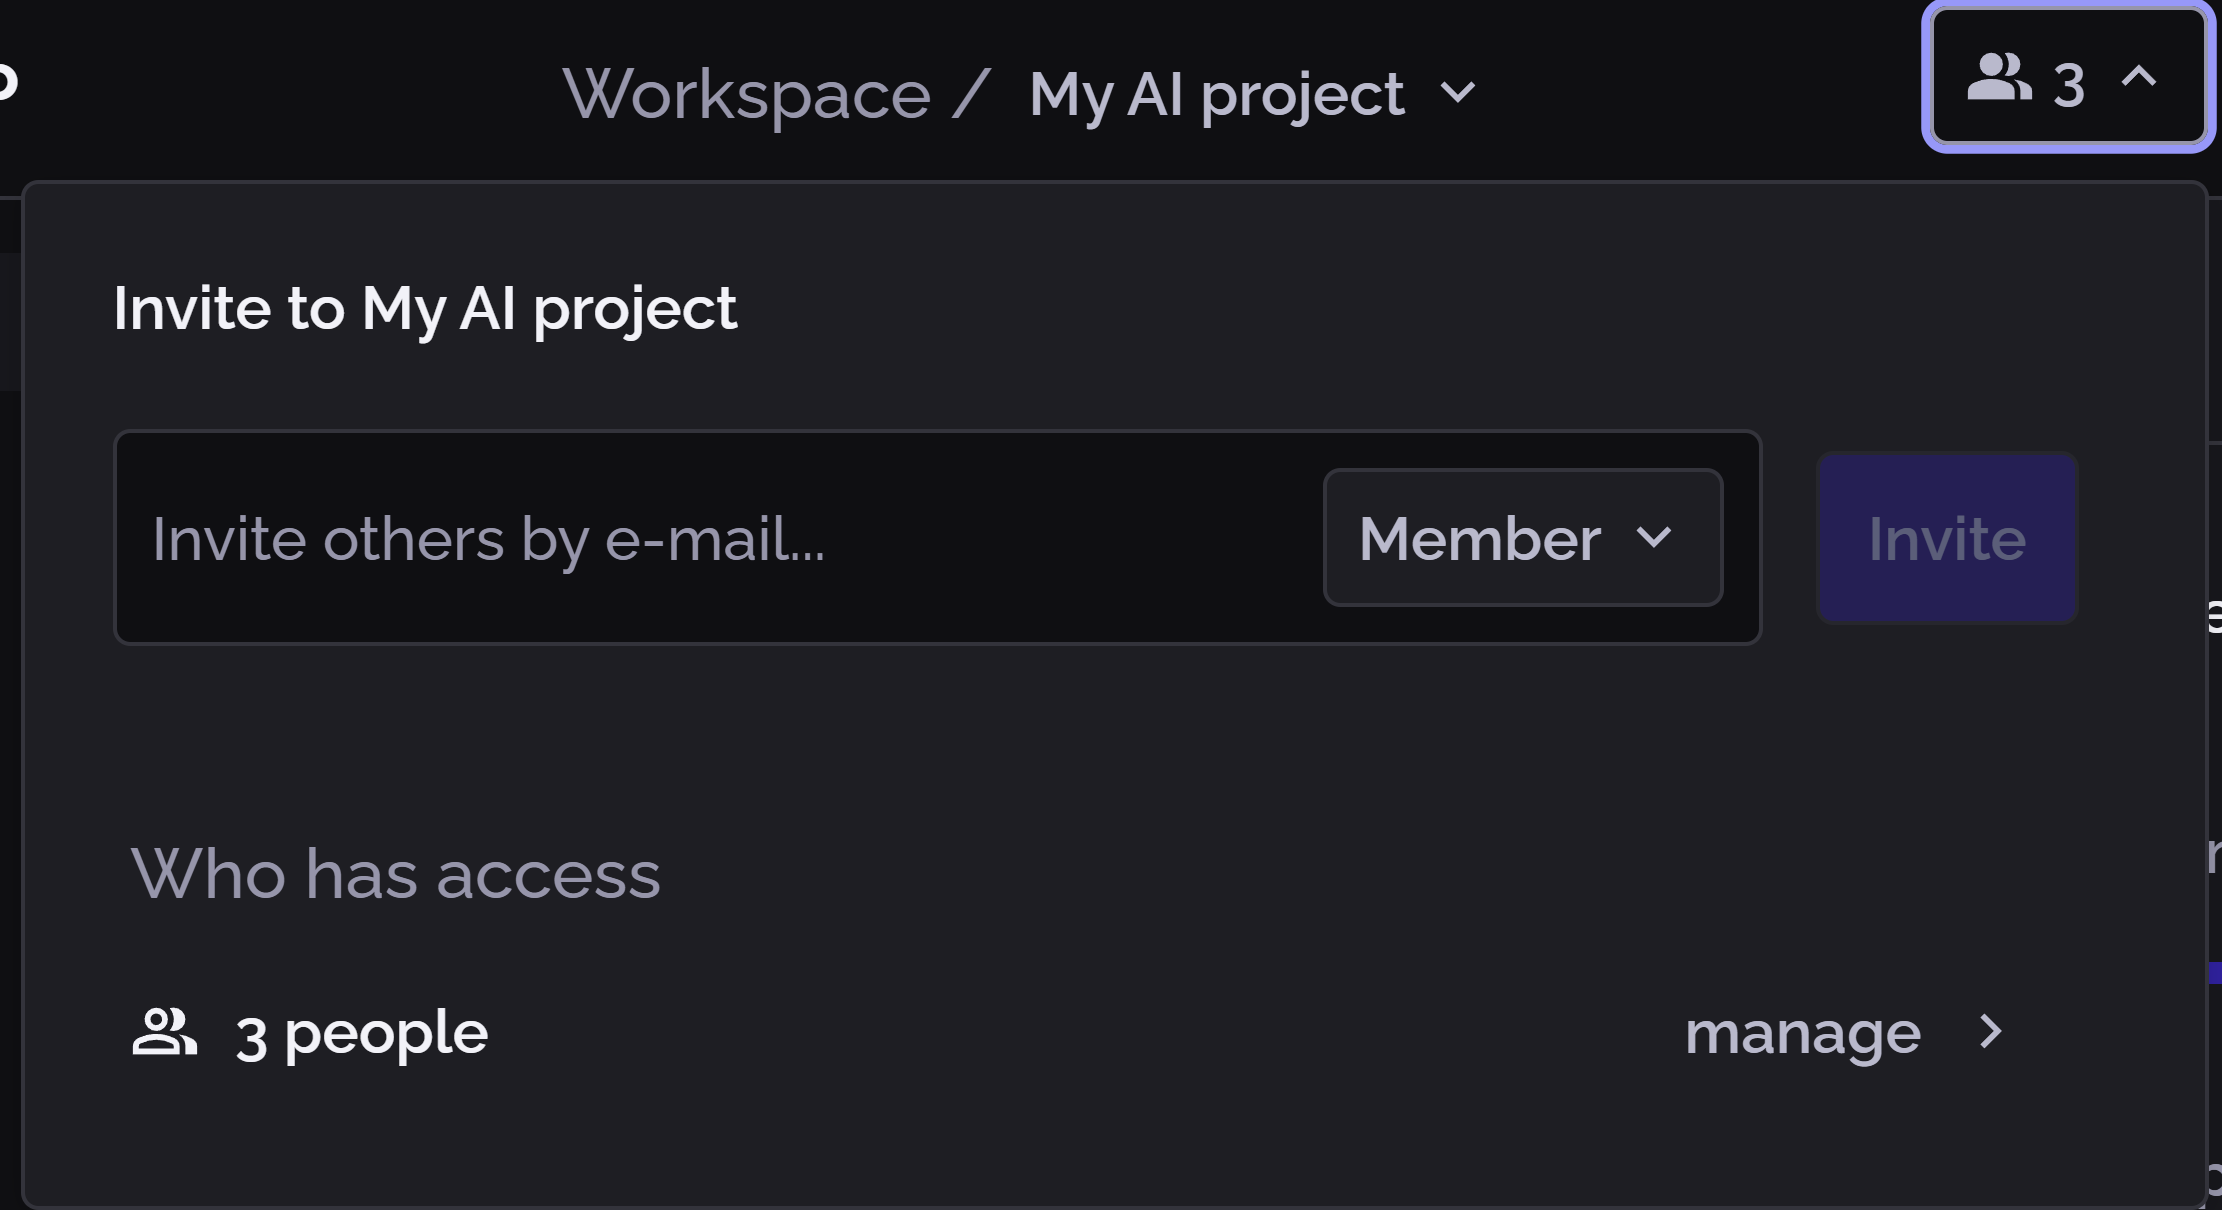
To view who has access to a project:
-
Open the project in the Playground.
-
Click the collaboration icon on the right in the header:

This opens a popup allowing you to invite new members to join the project:
-
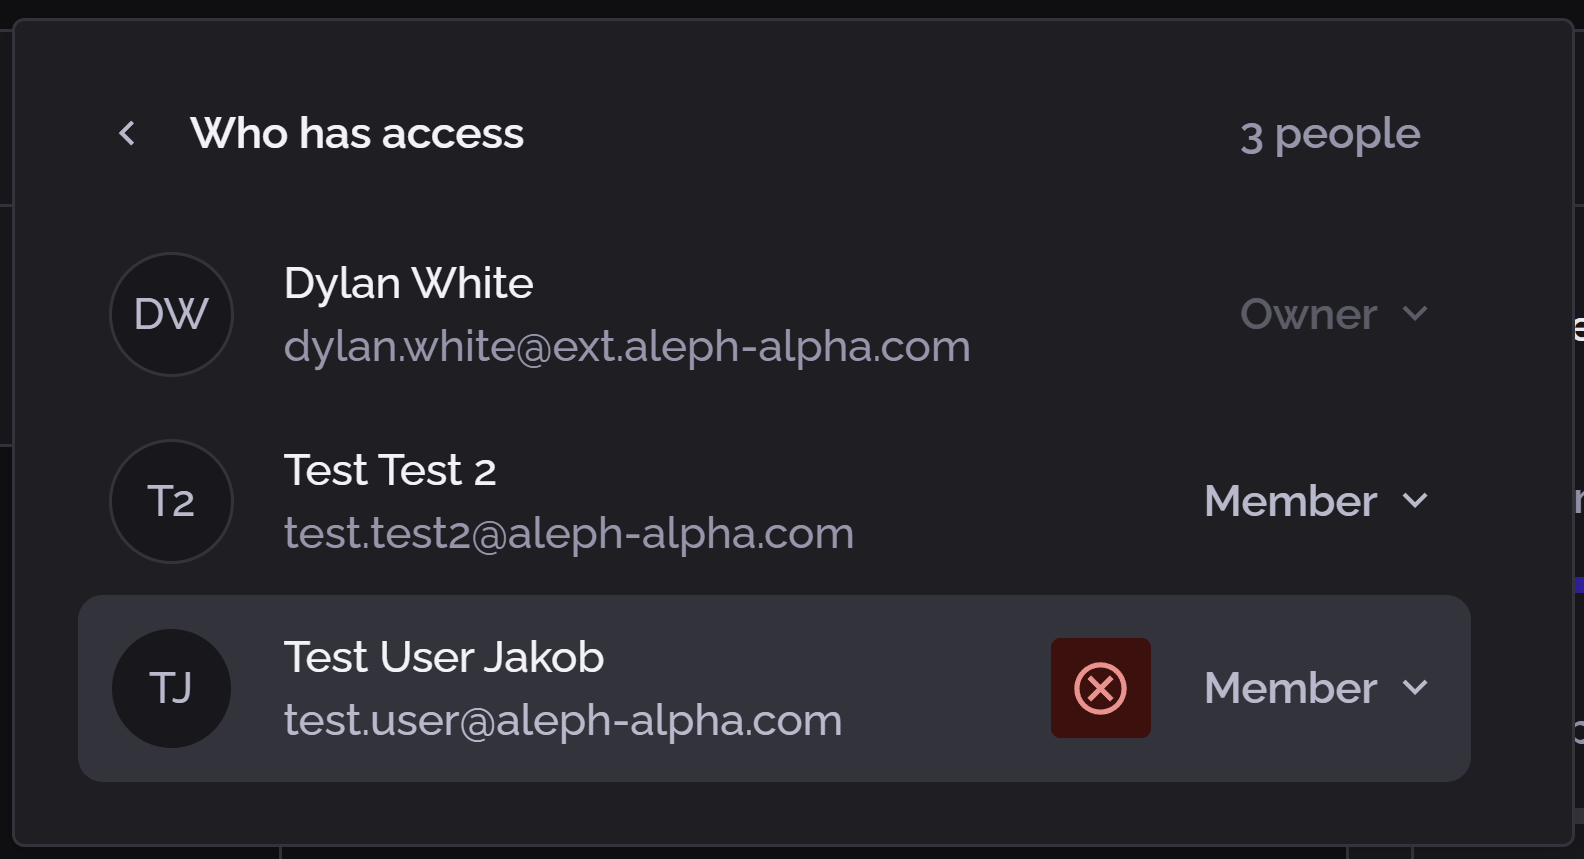
Click Manage to see the list of users:
-
To change a user’s role, click their existing role (Member or Owner) and select the new role.
-
To remove a user from the project, click the red cross icon
 next to the user’s name in the access list.
To invite new users to the project:
-
Return to the invitation box and start entering the email address of the user you want to add.
-
Select the user from the list of matches proposed by PhariaStudio.
-
Select Member or Owner to assign the appropriate role to the new user.
-
Click Invite.
-
Repeat this process to add as many users as required.
Add service credentials to projects
| For information on how to get service credentials, see Managing service accounts, roles, and API tokens in PhariaOS. |
Currently, it is not possible to manage service credentials from the PhariaStudio UI. However, you can assign project visibility to a service credential by using the PhariaStudio API directly. Use the following curl command to add service credentials to a project:
curl --request PATCH \
  --url https://api.pharia.example.com/v1/studio/workspaces/default/projects/<project-id>/userlist \
  --header 'Authorization: Bearer <project-owner-pharia-bearer-token>' \
  --header 'Content-Type: application/json' \
  --data '{
  "upsert": [
    {
      "id": "<service-credentials-id>",
      "role": "member"
    }
  ],
  "remove": []
}'
To obtain the service-credentials-id, copy it from the URL when accessing the service credential details in PhariaOS.
The service-credentials-id is not the token ID associated to the service credential. Once a service credential ID is linked to a project, all tokens connected to that credential ID will have access to the project content.
|
Remove service credentials from projects
Service credentials are not listed as members in the UI. Therefore, it is necessary to use the PhariaStudio API to revoke access to a project. Use the following curl command for this purpose:
curl --request PATCH \
  --url https://api.pharia.example.com/v1/studio/workspaces/default/projects/<project-id>/userlist \
  --header 'Authorization: Bearer <project-owner-pharia-bearer-token>' \
  --header 'Content-Type: application/json' \
  --data '{
  "upsert": [],
  "remove": [
    {
      "id": "<service-credentials-id>",
      "role": "member"
    }
  ]
}'