Collections of documents
In PhariaAssistant, you can create collections of documents that you can select during a conversation in Chat, allowing you to ask questions about those documents. Collections are persistent, which means you can select them in different chats. You can also add and remove documents from a collection.
Collections can be your own, called personal collections, or they can be created and managed by your organisation. You cannot modify your organisation’s collections unless you have the correct permissions.
Creating a new collection
To create a collection of documents that you can select during chats:
-
Click Collections in the left sidebar.
Any existing collections are listed here. Your own collections are shown in the Created by me tab. -
Click Create collection.
The create collections page appears, showing a default name for the collection. -
You can change the name of the collection by hovering your cursor over the name, clicking the edit icon
 that appears, and editing the name.
 -
Add documents (up to 100) to your collection in one of the following ways:
-
Drag and drop files from your file selector onto the page.
-
Click Add documents and select files from your file selector.
-
-
Click Upload when you are finished selecting documents.
Note that if a SharePoint connection has been configured on your system, you can also click Add from SharePoint and select documents from your SharePoint, which is displayed in a new browser window.
You now see the collection’s list of documents. Click Collections created by me to return to the list of collections.
Limitations
Document collections are limited as follows:
-
You can include up to a total of 100 documents per collection.
-
The following document formats are supported: .doc, .docx, .pdf, .txt.
-
Each file can have a maximum of 1000 pages and a size of up to 100 MB.
-
PhariaAssistant currently supports text extraction only from PDF files that contain selectable text. Scanned documents requiring optical character recognition (OCR) are not supported at this time.
Renaming a collection
Collections are giving a default name on creation, but you can customise this name:
-
In the Collections page, click the collection you want to rename from the list.
-
Hover your cursor over the name, and click the edit icon
that appears. -
Edit the collection name as required.
-
Click
 or press Return on your keyboard.
The collection displays its new name.
Adding documents to a collection
To add further documents to a collection:
-
In the Collections page, click the collection you want to add documents to.
-
Click Add documents.
-
Add documents (up to 100) to your collection in one of two ways:
-
Drag and drop files from your file selector onto the page.
-
Click Add documents and select files from your file selector.
-
-
Click Upload when you are finished selecting documents.
Note that if a SharePoint connection has been configured on your system, you can also click Add from SharePoint and select documents from your SharePoint, which is displayed in a new browser window.
The collection now includes the added documents.
Removing documents from a collection
To remove documents from a collection:
-
In the Collections page, click the collection you want to remove files from.
-
Select the files you want to remove:
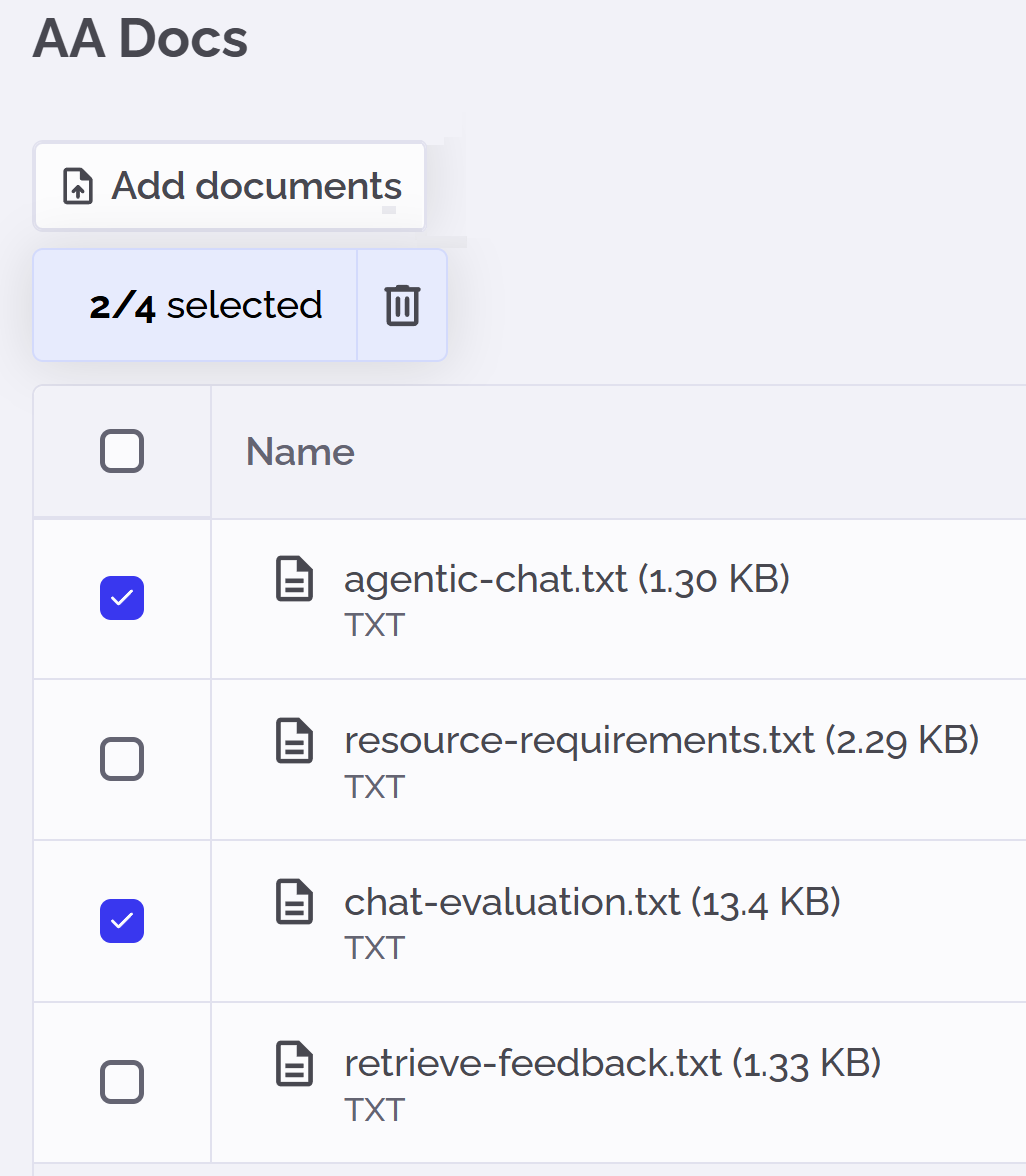
-
Click the trash icon
 above the files list.
 -
Confirm the removal in the confirmation popup.
The collection no longer contains the removed documents.