How to Configure Sign-Up Options
This guide walks you through the sign-up options for users in PhariaAI. You can choose to configure the following options: Single Sign-On (SSO) with an external identity provider, or self-registration via email.
How to Enable SSO with an External Identity Provider
The internal identity provider of PhariaAI, Zitadel, offers the possibility to integrate external identity providers for single sign-on (SSO). This allows users to log in to PhariaAI with their existing account from a company identity provider, such as Google, Microsoft, or Okta.
Prerequisites
- You enabled the flag
pharia-iam.config.adminEnableZitadelManagementduring the installation of PhariaAI, see section 1 at Installation of PhariaAI -> Helm Chart Installation -> IAM Configuration.
Configure an External Identity Provider in Zitadel
- Open the Zitadel Console
- Navigate to the Zitadel console at
https://login.<YOUR_CONFIGURED_DOMAIN>and log in with your initial user account. - If you happen to land on the info page of your admin account, navigate to
https://login.<YOUR_CONFIGURED_DOMAIN>/ui/consoleor click on the logo in the top left corner. If this has no effect, you probably logged in with the wrong account.
- Navigate to the Zitadel console at
- Add an External Identity Provider
- Switch to the Pharia organization.
- Go to the
Settingstab and selectIdentity Provider. Here you find a list of pre-configured external identity providers. Choose the desired provider and follow the instructions. - For a seamless user experience, allow accounts to be created automatically only.

- Make sure to activate the identity provider by clicking on the
Activatebutton. For more information on how to configure external identity providers, see the Zitadel documentation.
- Switch to the Pharia organization.
Enable SSO in the login page
- Enable external login for the Pharia Organization
- Go to the
Settingstab and selectLogin Behavior and Security. On the bottom of the page, check the box forExternal Login allowed. Then click onSave.
- Go to the
- Make Pharia the Default Organization
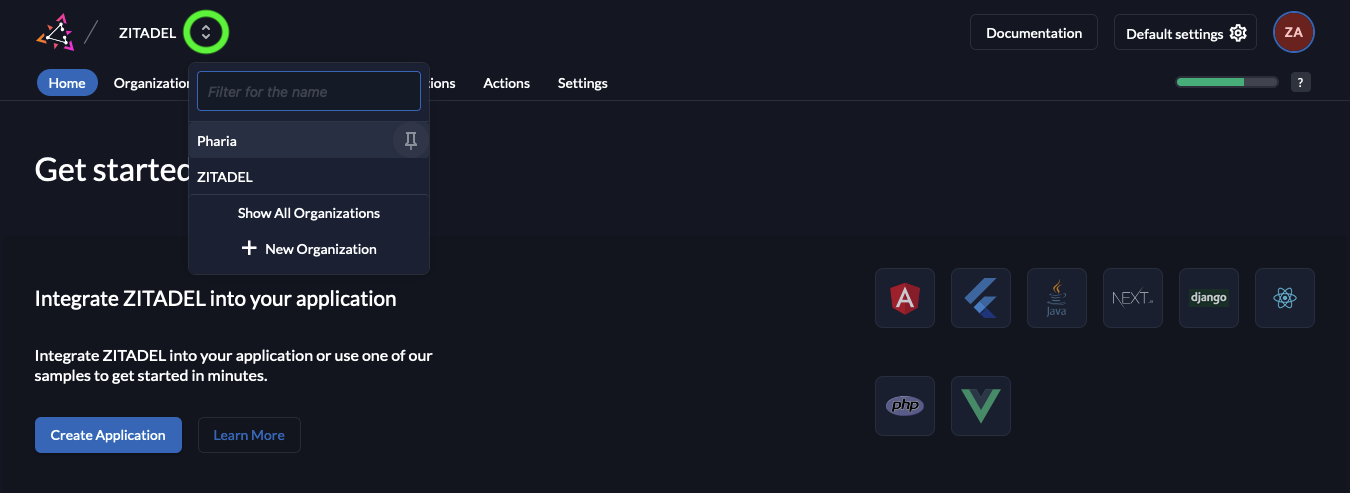
- Go to the all organizations view by clicking on the two arrows next to the organization name in the top left corner and choosing
Show All Organizations.
- Click on the three dots next to the Pharia Organization and select
Set as default organization.
- Go to the all organizations view by clicking on the two arrows next to the organization name in the top left corner and choosing
Configure Default Roles for Federated Users
To access any resource in PhariaAI, a user must be assigned a role. You can configure default roles for federated users to be assigned on the first login.
Add Role Assignment
- Go to the
Actionstab, a default action with the nameassignDefaultRoleshould already be present, which by default assigns theAssistantUserrole. If you wish to have another default role thanAssistantUser, you can change this in the values underpharia-iam.config.defaultRolesForLogin. - Select the Flow Type
External Authenticationand click theAdd Triggerbutton. Select Trigger TypePost Creationand select theassignDefaultRoleAction. Click onSave.
How to Enable Self-Sign-Up
PhariaAI uses Zitadel as an identity provider. Zitadel provides a self-service registration flow that allows users to sign up for an account without the need for an administrator to create an account for them. Using this flow, a user can sign up for an account by providing their email address and a password. They will then receive a verification email to confirm their email address and complete the registration process. We recommend to filter the email addresses to only allow users with a specific domain to sign up.
Prerequisites
- You enabled the flag
pharia-iam.config.adminEnableZitadelManagementduring the installation of PhariaAI, see section 1 at Installation of PhariaAI -> Helm Chart Installation -> IAM Configuration. - You have an email provider which you can use to send verification emails.
Configure an Email Provider in Zitadel
To enable self-sign-up, you need to configure an email provider in Zitadel. This is necessary to send verification emails to users who sign up for an account. You can use one of the pre-configured email providers or any other email provider that supports SMTP or API-based email sending.
- Open the Zitadel Console
- Navigate to the Zitadel console at
https://login.<YOUR_CONFIGURED_DOMAIN>/and log in with your initial user account. - If you happen to land on the info page of your admin account, navigate to
https://login.<YOUR_CONFIGURED_DOMAIN>/ui/consoleor click on the logo in the top left corner. If this has no effect, you probably logged in with the wrong account.
- Navigate to the Zitadel console at
- Configure an Email Provider
- Open the
Default Settingson the right upper corner and navigate to theEmail Providerssection. - Add your preferred email provider by clicking on its icon and following the instructions.
- Open the
Enable Self-Registration in Zitadel
- Open the Zitadel Console
- Go back to the main screen by clicking on the logo in the top left corner.
- Enable Self-Sign-Up and Domain Discovery for the Pharia Organization
- Switch to the Pharia organization.
- Go to the
Settingstab and selectLogin Behavior and Security. On the bottom of the page, check the boxes forUser Registration allowedandDomain Discovery allowed. Then click onSave.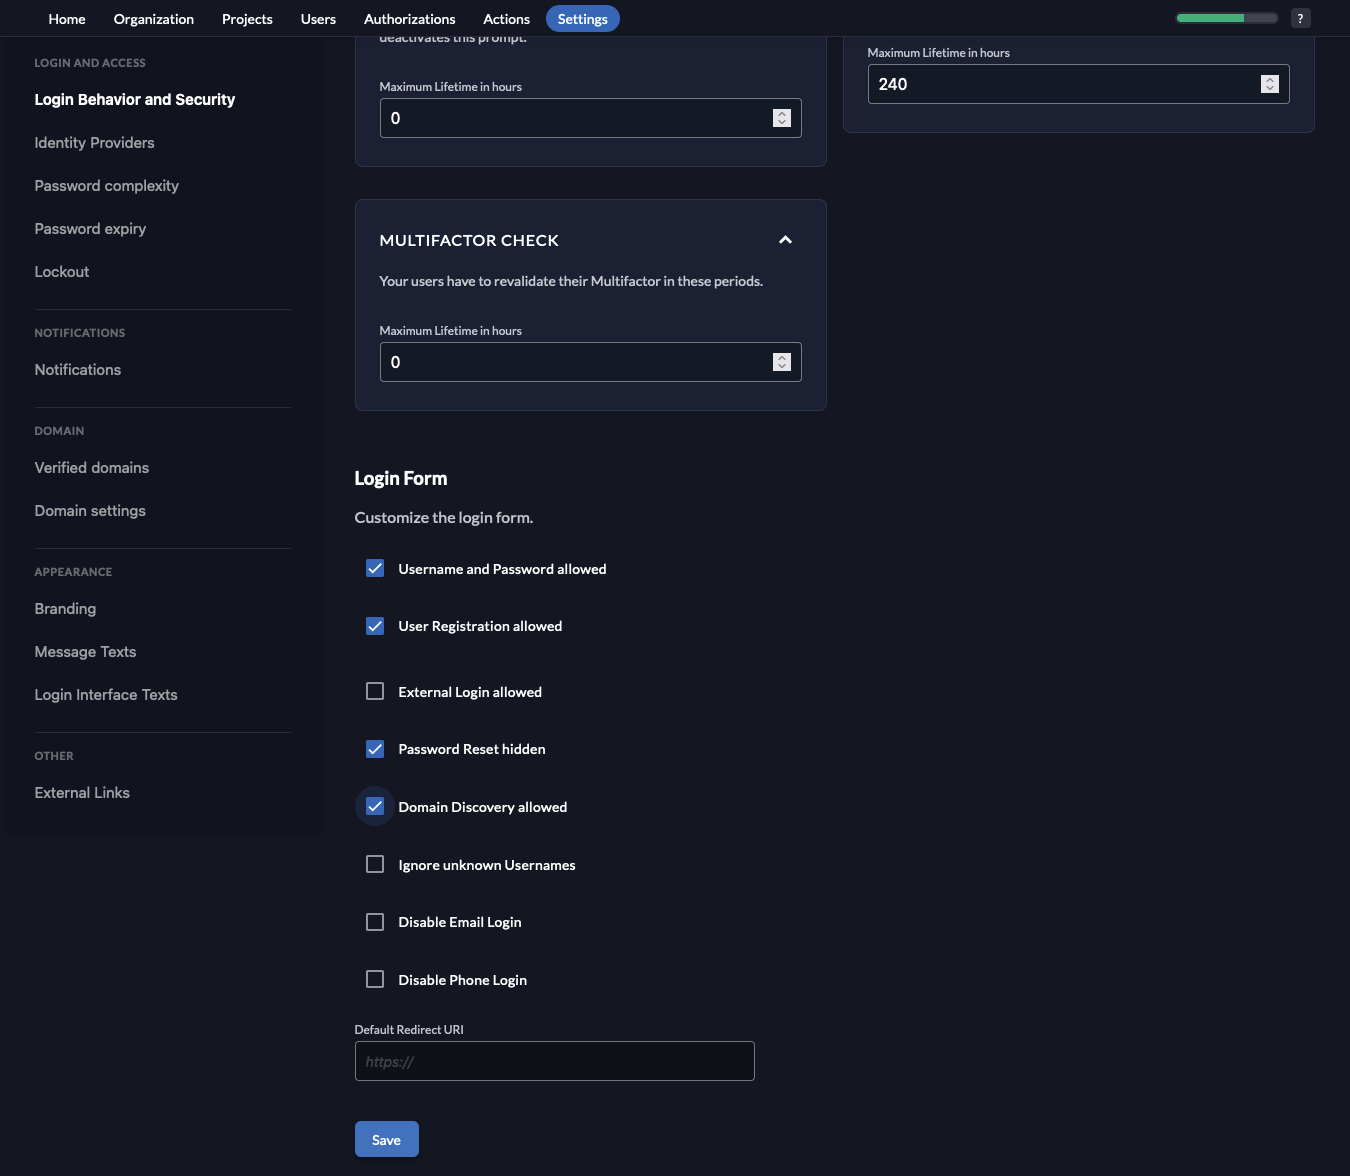
- Navigate to the settings for
Verified domains. Make sure that the email domain of your company appears here, otherwise add it by clicking on the+ Newbutton.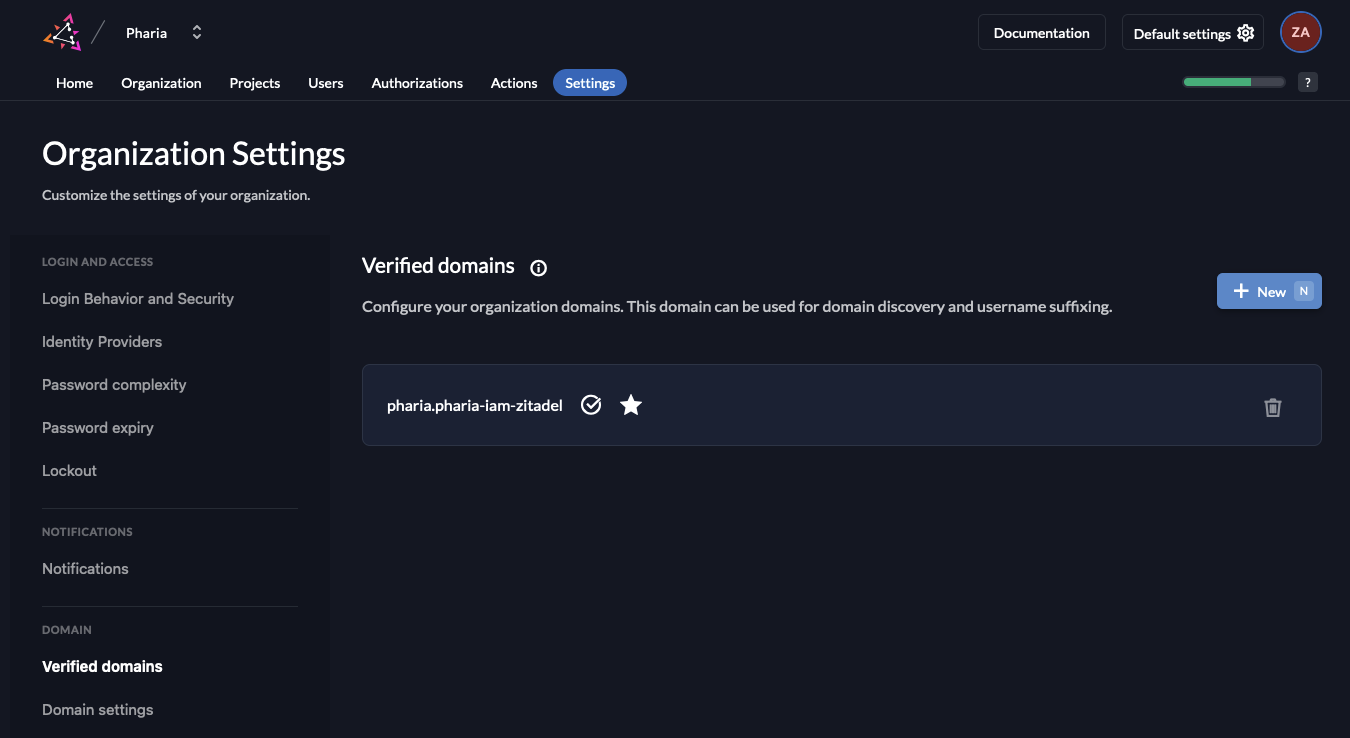
- Switch to the Pharia organization.
- Install check for correct domain on sign up
- Navigate to the
Actionstab and click on the+ Newbutton to create a new action. Make sure that the action has the same name as the function defined in the action, in this examplefilterRegistration. Copy the code from the snippet below and paste it into the editor. You need to replace the example domains with the domains you want to allow for sign-up, and you may add more domains if needed. For further information on how to write actions, see the Zitadel documentation./**
* Only allow users with a given domain to register
*
* Flow: Internal Authentication or External Authentication, Trigger: Pre creation
*
* @param ctx
* @param api
*/
function filterRegistration(ctx, api) {
let validDomains = ["domain1.com", "domain2.com"];
let isValid = false;
for (const domain of validDomains){
if (ctx.v1.user.human.email.endsWith("@" + domain)) {
isValid = true;
break;
}
}
if (!isValid){
throw "email needs to be from domain " + validDomains.join(", ");
}
} - Disable the box
Allowed To Fail. Disabling this checkbox generates a warning as any coding errors for example may now prevent anyone to register. However, as we specifically want to prevent registration from users with an invalid domain. Therefore, we can close the warning and then click onAdd.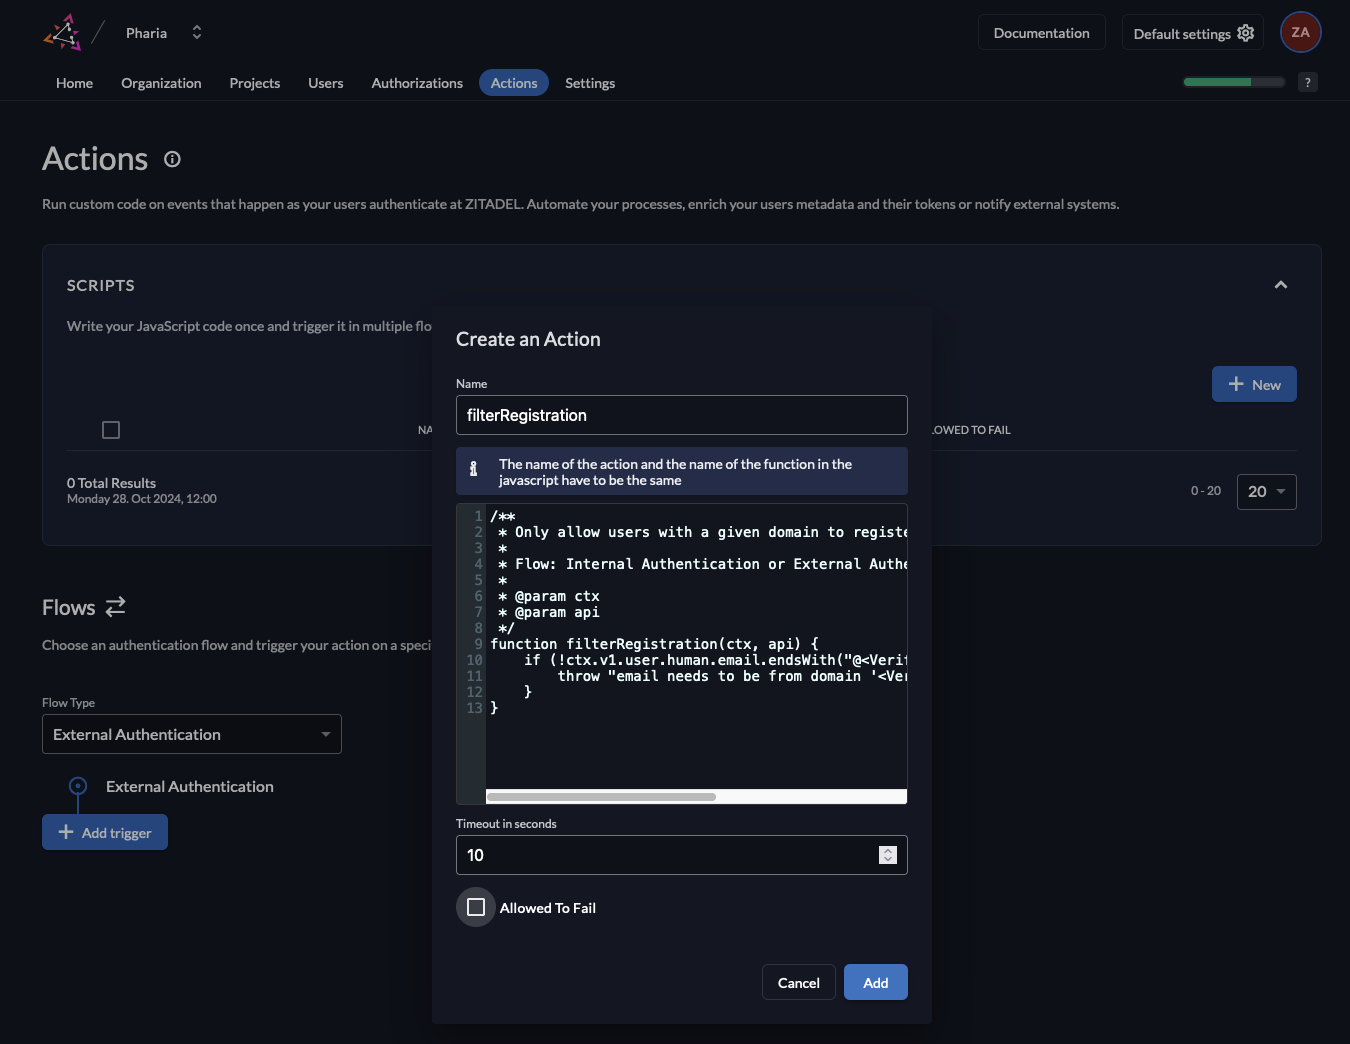
- Select the Flow Type
Internal Authenticationand click theAdd Triggerbutton. Now select the Trigger TypePre Creationand select the previously created Action. Click onSave.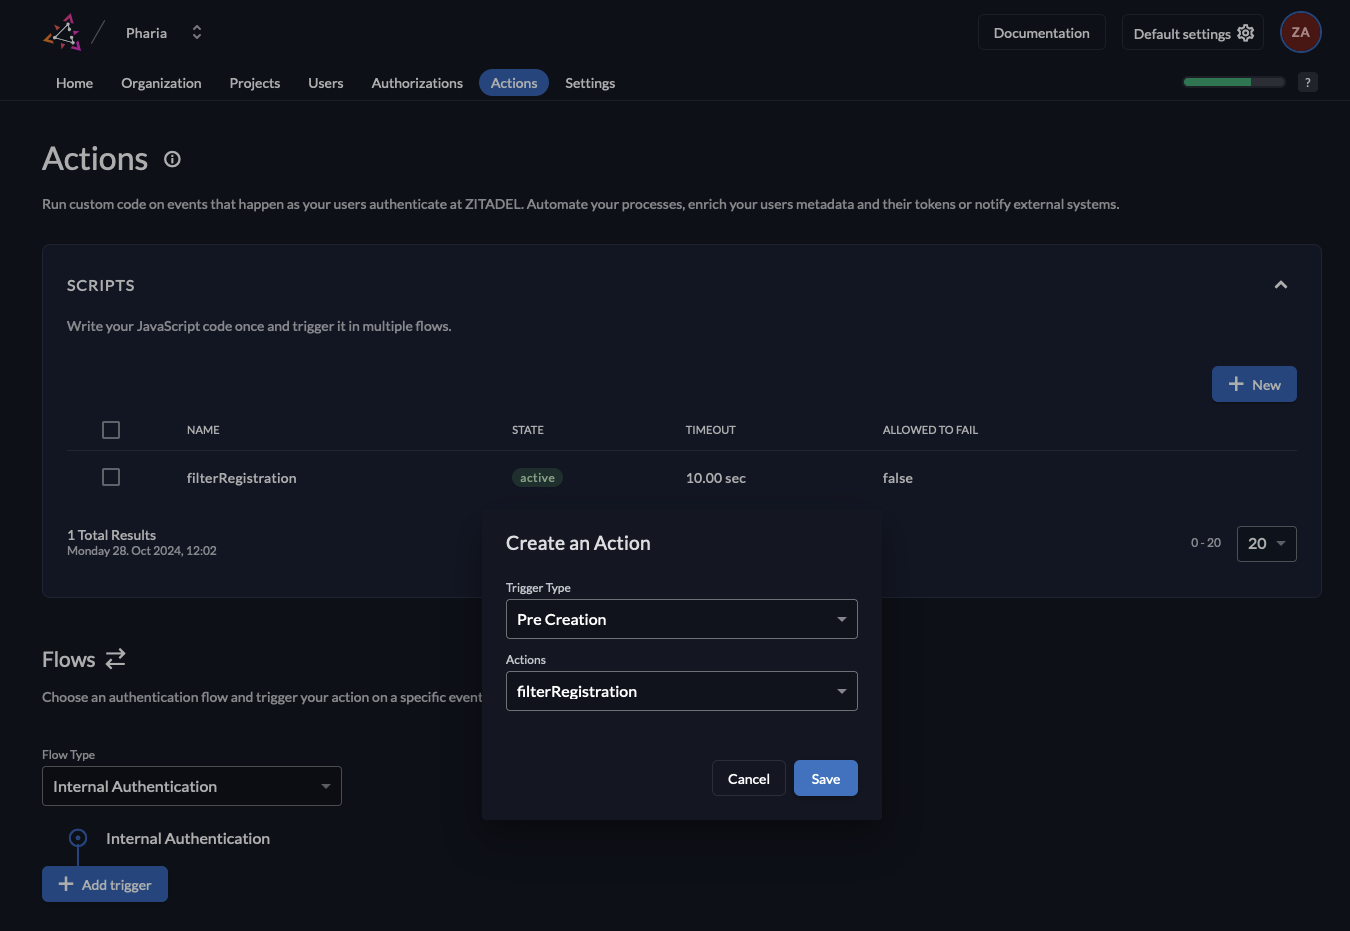
- Navigate to the
Optional: Configure Default Roles for Self-Registration
To access any resource in PhariaAI, a user must be assigned a role. You can configure default roles for federated users to be assigned for newly registered users.
Add Role Assignment
- Stay in the
Actionstab for the Pharia organization, a default action with the nameassignDefaultRoleshould already be present. If you wish to have another default role thanAssistantUser, you can change this in the values underpharia-iam.config.defaultRolesForLogin. - Again, select the Flow Type
Internal Authenticationand click theAdd Triggerbutton. This time select Trigger TypePost Creationand select the previously created Action. Click onSave.