Projects
Roles: project manager, annotator
If your use case contains no projects yet, you see the Create your first project screen when you open the use case. Click Get started, and follow the instructions to create a new project.
If your use case contains projects, you see the Your projects page that shows all the projects in the selected use case. See Viewing your projects.
Viewing your projects
Role: project manager
The Your projects page shows basic information for each project:
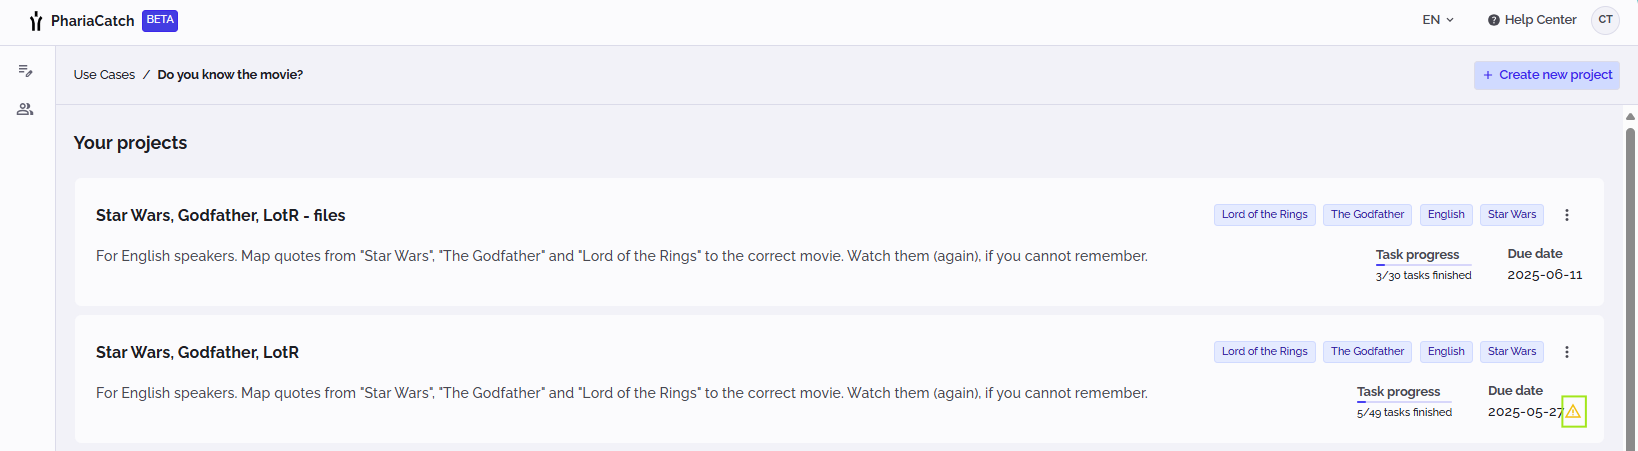
Each project tile indicates the following:
- the project name and description
- the project tags
- the project due date
- the project progress expressed as the number of tasks completed
If the project due date is soon, a warning icon appears next to the due date:

To access a project, click its tile. Project managers do this to manage the project, whereas annotators do this to access their tasks.
Project managers can create new projects, as well as edit and delete existing ones.
Creating a project
Role: project manager
To create a new project:
- If you are working on a use case with existing projects, click Create new project at the top right of the use case page.
- If you are creating the first project for the use case, click Get started in the Create your first project page.
From here, there are three steps to define a project: specifying its basic details, defining its annotation and task types as well as labels, and assigning a workforce to the project.
Define the project details
TIP: If you have existing projects in the use case, and you want to copy the details of a similar project to your new project, click Select project and select this existing project. The selected project's name, description, due date, and tags are copied from the previous project. (This option is not available if you are creating the first project in the use case.)
To define the project details:
- Enter a name for the project.
- Optionally, enter a description for the project.
- Click the Project due date field and select an end date from the calendar.
- Optionally, enter project tags; these can be used to group tasks in the task overview.
Define the annotation and task types and labels
NOTE: Currently, PhariaCatch supports only one type of task: "Classification". More types are coming soon!
To define the annotation types, task types and labels in the project:
- Click Add task instruction.
The Add task instruction window appears. - Enter clear and detailed instructions on how to complete the task. The task instruction will be displayed with each data point as a reference for the annotator. This helps to create high-quality and consistent datasets.
- Click Save.
- Specify whether annotators can assign only one label to each data point (Single), or whether they can select multiple labels (Multi).
Now define the labels for the tasks. - Click Add label.
- Click Give this label a name and enter the label name.
- Click Add label instruction and enter information to guide annotators on how to assign this label to data points. Be as clear as possible.
- Click Add another label and repeat the above steps to define a second label. (You need to define at least two labels.) Repeat this step to define the labels you need.
IMPORTANT: You cannot edit labels and label instructions after you have created the project! This is to protect the integrity and consistency of the resulting datasets. Therefore, take care when adding labels and writing instructions.
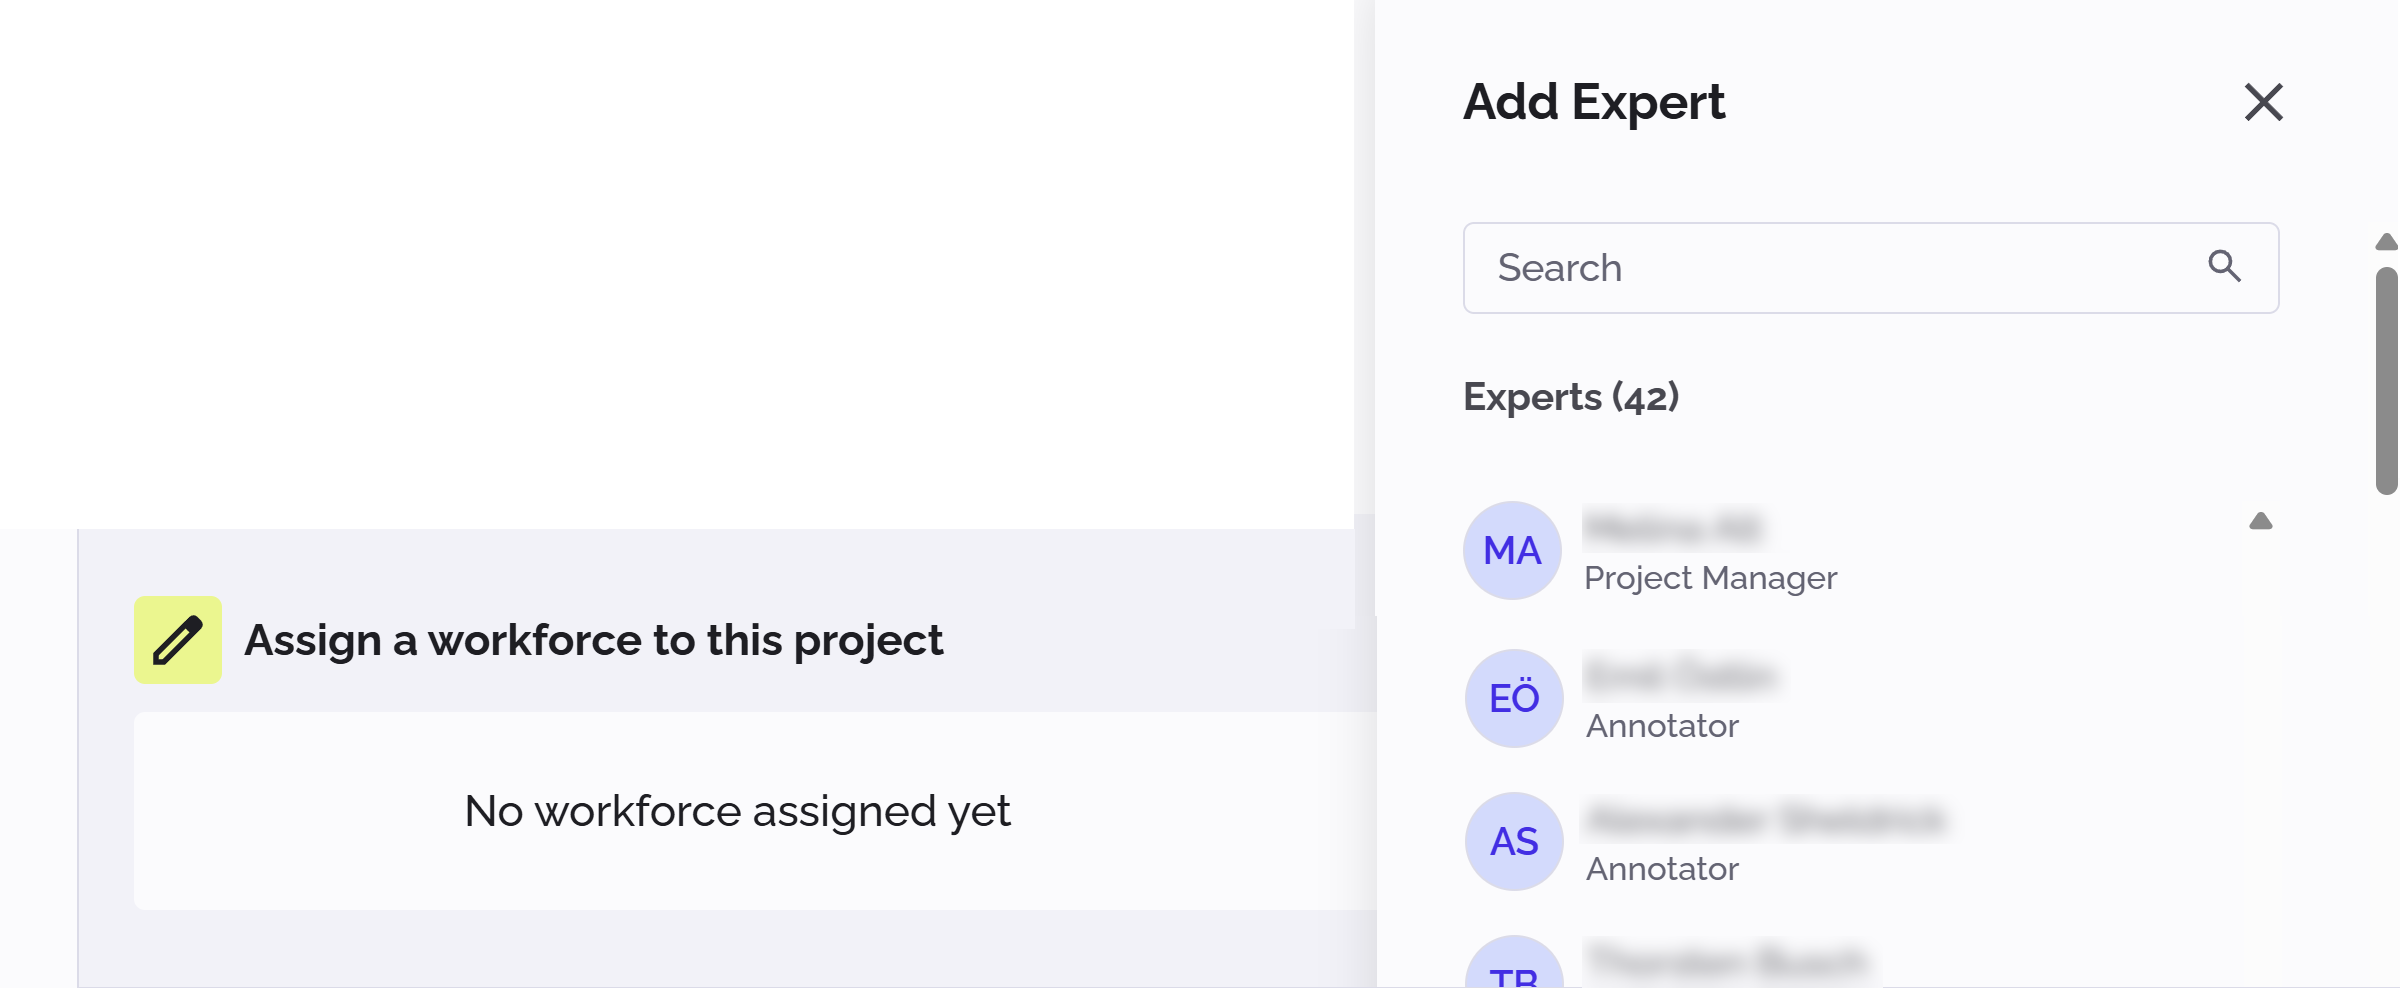
Assign a workforce
For each project, you need to assign domain experts with the required knowledge and capability to be annotators of your data points. Your selection of annotators is the group of people to whom you can assign tasks in the project.
In your project, you define a workforce, which is a pool of annotators you can assign to tasks. Note that you can also include other project managers in your workforce; they cannot annotate tasks, but they will have access to the project.
To create a workforce:
- Click Select experts.
The Add expert list appears with the available annotators and project managers whom you can include in your workforce:
-
Click all the users in the list that you want to be members of the workforce for your project.
The selected users are added to the Assigned experts list. -
If necessary, remove unwanted users by clicking the “X” next to their names in the Assigned experts list.
IMPORTANT: Currently, you cannot edit your workforce after you have created the project! Therefore, take care when constructing your workforce.
Create the project
Well all the above steps have been completed, click Create project at the bottom right of the page. PhariaCatch informs you on the page of any missing information or errors. These must be corrected before you can create the project.
Editing a project
Role: project manager
You can edit some details of an existing project, but not the defining criteria that are critical in any progress stage.
To edit an existing project:
- Click the kebab menu icon in the project tile.
-
Select Edit from the menu.
The Edit project window appears. -
Edit the project name, description, due date and/or tags, as required.
-
Click Save changes.
The project tile on the Your projects page now shows the edited details.
Deleting a project
Role: project manager
To delete a project:
- Click the kebab menu icon in the project tile.
- Select Delete from the menu.
The project is deleted and its tile is removed from the Your projects page.